In this blog post, we will be discussing how to manufacture small FPGA boards. We will go over the different methods and steps involved in manufacturing these boards so that you can easily produce them on your own. Whether you are looking to create a prototype or mass produce your design, this post will give you the information you need to get started. So let’s get started!
Before you begin, you will need the following materials:
Getting started with any project can be daunting, but when you’re ready to venture into the world of modern-day small fpga boards, there are some essential materials that you’ll need. Before you can begin your project, identify what small fpga board is right for you: Do your research on small fpga board specifications, features, and components to make sure it’s the perfect fit. Once you know which small fpga board to use, make sure the necessary components are at hand so that you can start your small fpga board project with ease. Cables, jumper wires, transistors – all of these materials will help get your small fpga board up and running. It’s time to get your small fpga board out into the world in a big way!
-FPGA development board
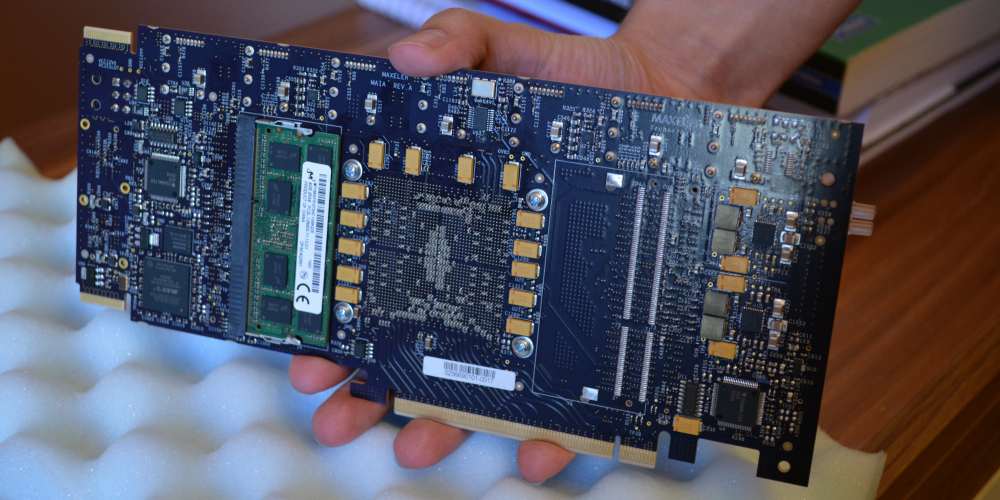
FPGA development boards are small, single-board systems designed for prototyping or performing small tests or small-scale deployments. It’s small form factor makes it most suitable for small to medium scale projects and its interoperability with other engineering tools sets it apart from many others. While FPGA development boards can have relatively low computing power compared to more traditional computers, they are much better equipped with high-level specific functionalities such as connectivity, speech recognition and AI capabilities. This is why they are chosen in a variety of areas such as medical, automotive and industrial automation applications. Moreover, thanks to their small size and portability they can be used in robot control and UAVs in missions where space is limited.
-Small FPGA Board
Small FPGA boards are shaking up the tech industry. These small, yet powerful boards are ideal for developers and designers as they allow them to easily prototype hardware projects in small form factors. With their design versatility and flexibility, small FPGA boards make some of the most complex designs easier to model and visualize. By utilizing an FPGA board, your project can be run with much higher performance at a fraction of the cost compared to using alternative development methods. Furthermore, with the small size of the FPGA board, development processes become even more streamlined and efficient with limited space requirements. From hobby projects to commercial products, small FPGA boards provide endless possibilities for creative engineering solutions.
Follow these instructions to manufacture your own small FPGA board:
Creating your own small FPGA board can be a relatively simple process if you follow the right instructions. Before you start, however, it’s important to know what exactly an FPGA Board is and how small one differs from a regular-sized FPGA board. An FPGA board is basically an integrated circuit composed of multiple small logic blocks that can be interconnected in order to implement complex system functions. They are usually small in size and usually cheaper than other types of boards such as PCBs or motherboards. When creating a small FPGA board, there are several steps to follow—ranging from researching parts and wiring processes to programming the small FPGAboard for proper operation. With the right tools and preparation, making your own small FPGA board can be a fun and rewarding experience that allows you to achieve more control over performance and customize features to better suit your needs.
Once you have all of your materials, it’s time to get started!
Once you have all of the small fpga board and other components needed to get started, it is time to begin your journey into the fascinating world of programming logic devices. All that stands between you and success is a little bit of knowledge and lots of determination. Armed with these tools and your newly acquired skill set, you can begin exploring the endless possibilities offered by small fpgas and gain a better appreciation for their power and practicality. With hard work, dedication, and the right resources, you can make your way to the top of small fpga design.
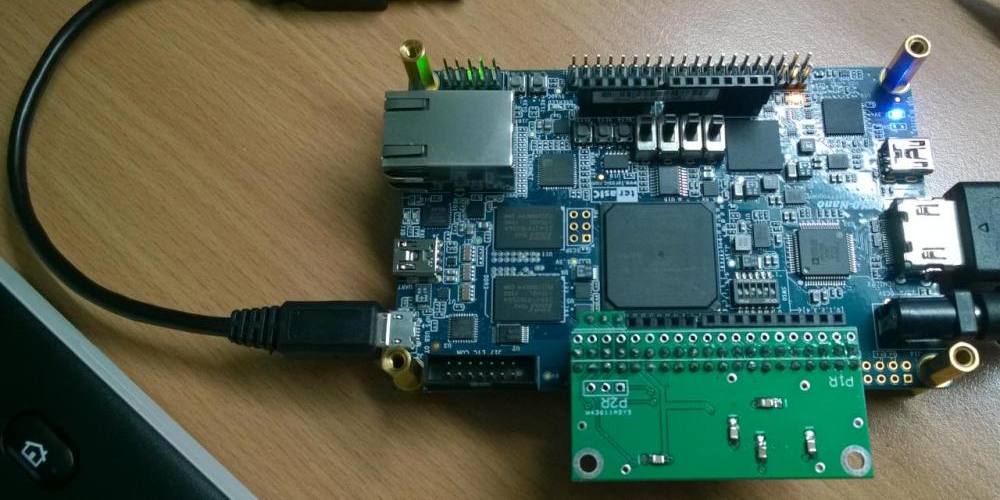
First, solder the headers onto the development board according to the manufacturer’s instructions.
Before starting any small FPGA project, it is essential to properly solder the headers onto the development board. This can be intimidating, but with some patience and careful attention to the manufacturer’s instructions, the task can be accomplished easily. By ensuring that the headers are correctly soldered on to the board, users will be able to set a strong foundation for their small FPGA project. Nailing small details like this at the start is key to successful results later down the line.
Next, connect the power and ground rails to the correct pins on the FPGA chip.
Before powering your small FPGA board, it is important to ensure the power and ground rails are connected to the correct pins on the FPGA chip. This is a critical step in properly setting up the small FPGA circuit and ensuring its proper functioning. Additionally, whether you are an experienced small FPGA assembler or a novice, take extra care to make sure you connect these elements correctly – mistakes here can be costly and time consuming to fix.